Mission Hardwood Floor Co. has installed over 20.000 floors. Rest assured, your project is in good hands!
WHAT TO EXPECT
There are as numerous ways to install flooring as there are flooring and installers. However, in our almost 50 years of business, Mission has come to adopt a process that is endorsed by the National Wood Flooring Association as standard. In fact, we are a founding member of the NWFA, and have helped establish consistent installation standards in the industry. Frankly, to install a floor any other way involves risk, risk that is senseless and ill-considered in such a long term investment as wood flooring.
While we follow a standard approach, each floor installation takes on its own character, due to extenuating conditions as well as the owner’s needs. Here are our standard approaches to installing solid and manufactured flooring, with some of the additional “bells and whistles” listed after.
SOLID HARDWOOD FLOORS:
The installation can be broken-down into four phases or steps:
Demolition: The removal and disposal of prior flooring, from carpet to ceramic tile. While we do not charge for tearing-out carpeting, we do charge for the removal of ceramic tile and other flooring. These require special tools and considerable time. We will remove all debris from the site. It is after this phase that we discover previously hidden “issues” with the concrete slab which must be resolved before we can install a subfloor or a new hardwood floor. It is not uncommon that the owner’s slab requires added material to “float” across lower spots or grinding to remove high points.
Subflooring: This is the process of preparing a substrate for the planking to lay upon. It consists first of a moisture barrier over the slab. Even older slabs are known to “breathe” giving off sufficient levels of vapor to curl brand new floors. The moisture barrier consists of a 6mm plastic barrier adhered to the slab with mastic cold bond. This stops the moisture flow. On top of this moisture barrier we affix 4’ by 8’ sheets of CDX plywood, spiked directly into the slab. This is your floor’s foundation. In the case where the subflooring is already plywood, and not concrete –such as on second levels, we use Aquabar or an adhesive with moisture protection additional to the nails.
Glue down: Solid hardwood floors can also be glued down direct to your concrete slab. Adhesive manufacturers offer lifetime warranties on moisture vapor protection from your slab, as well as a lifetime warranty on proper adhesion. Straps and wall jacks tighten the fit and are removed the next day once the adhesive has dried.
Planking: Once the subflooring is installed, we can begin to install the solid planks. This assumes that the planks have been in the residence acclimating to the conditions. The first step is to snap a “true line” with chalk for the first row of flooring to be installed. This first row of wood becomes the guide for all others in that area, and is the most critical. These planks are blind nailed. Then we array, or block, the other planks on the floor as it would lay in order to manage the coloring and patterns for maximum effect. We then lay the next row of planks by firmly seating the groove of the new plank into the tongue of the first plank. We then drive a power cleat, on an angle, through the tongue of the new plank, every 6” to 10”, locking the new board into place. And so on, until we run into a wall or a threshold, where we will actually craft custom pieces, from the same wood, to fit.
Finishing: Finishing consists of converting the rough planks into a finished floor. The first step is to rough sand all the boards, along their grain, into the same height. This is the first time your floor will look like one floor. We then fill any gaps or imperfections will a matching color wood filler, by hand. Then we fine sand the floor again with a finer grit paper that will remove the excess filler and prepare the surface for sealer. Mission’s dust less system, sanders that have vacuums attached, retains 99% of the dust as it is sanded from the floor. After the second sanding we vacuum the surface once again, and prepare it for a color sealer. We then apply the desired color sealer, which must dry for 12 hours before any finish can be applied. To complete the job, we finish with two coats of premium grade clear finish, either water or oil based.
At this stage we also prepare custom transitions (reducers, thresholds, moldings) to other surfaces. We also install the wall finish, whether that be replacing the base board, installing matching or paint-ready quarter-round base shoe, or both.
OKAY, BUT HOW LONG WILL IT TAKE?
We use a simple formula for estimating how long it will take us to install a solid wood floor. Estimate that it will require between 1 and 1.5 full days for each 100 square feet of flooring. So, a 1000 square foot floor will require between 10 and 15 days to install, start to finish, not counting slab preparation if needed.
ENGINEERED FLOORS:
Since these floors are usually prefinished, they do not require finishing time or steps. So most can be installed in a simple two-step process:
Demolition: The removal and disposal of prior flooring, from carpet to ceramic tile.
While we do not charge for tearing-out carpeting, we do charge for the removal of ceramic tile and other flooring. These require special tools and considerable time. We then scrape the slab of any debris which might hinder the adhesion of new planking.
Planking: With the proper trowel, the manufacturer’s specified adhesive is troweled onto the slab, and the planking if called-for. The planks are then adhered to the slab, and given 24 hours for the glues to set.
HOW LONG DOES THIS TAKE?
Because no finishing steps are required, installation proceeds much more rapidly. The installation of prefinished flooring usually requires ½ day for every 100 feet of flooring. So, a 1000 square foot floor will require between 5 days to install, start to finish, not counting slab preparation if needed.
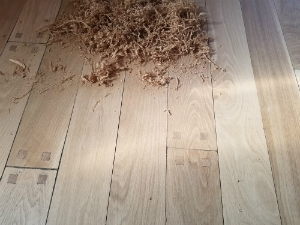
Solid wood floor, Nailed down on plywood
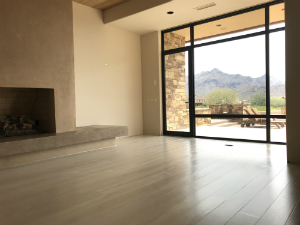
Contemporary, solid oak floor glued down to slab
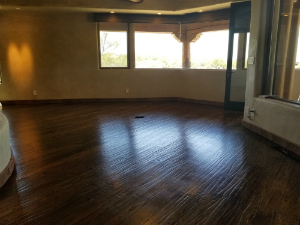
Solid floors are usually finished on site
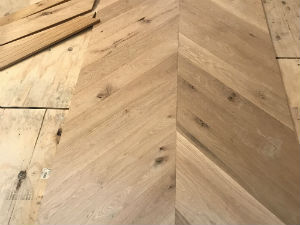
Solid hardwood floors are highly customizable